
How to setup your Browser Array?
 of any of the browsers in the Browser Array. Select “Configure Browser Array”
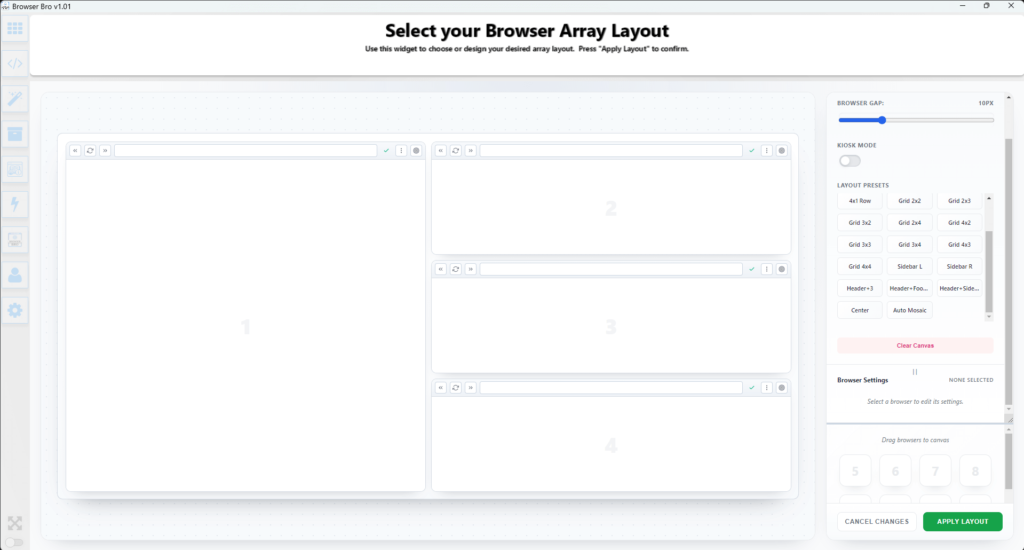
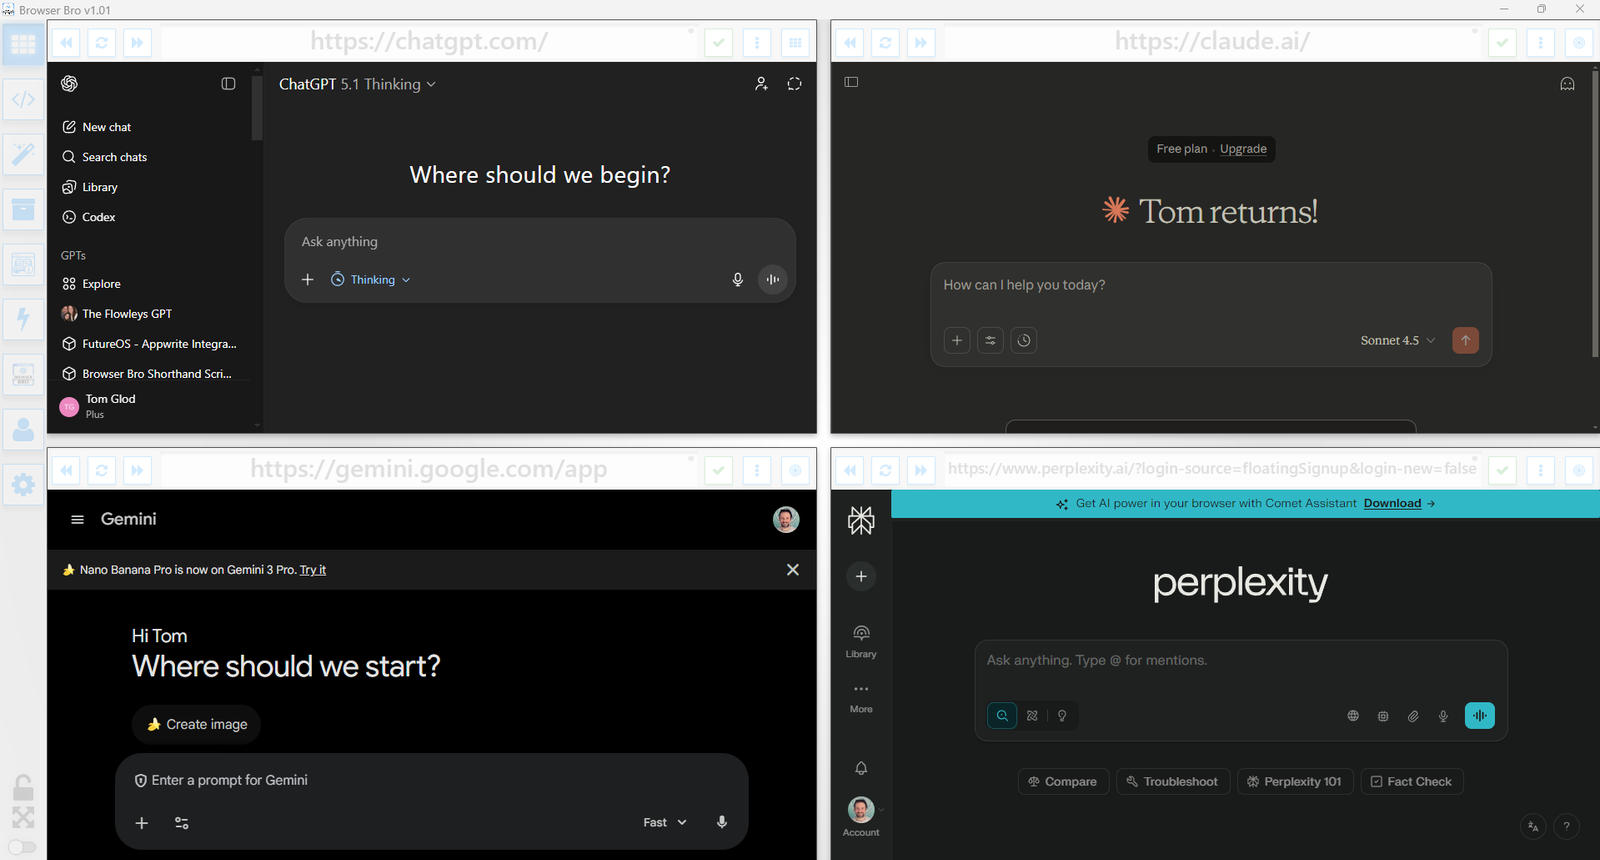
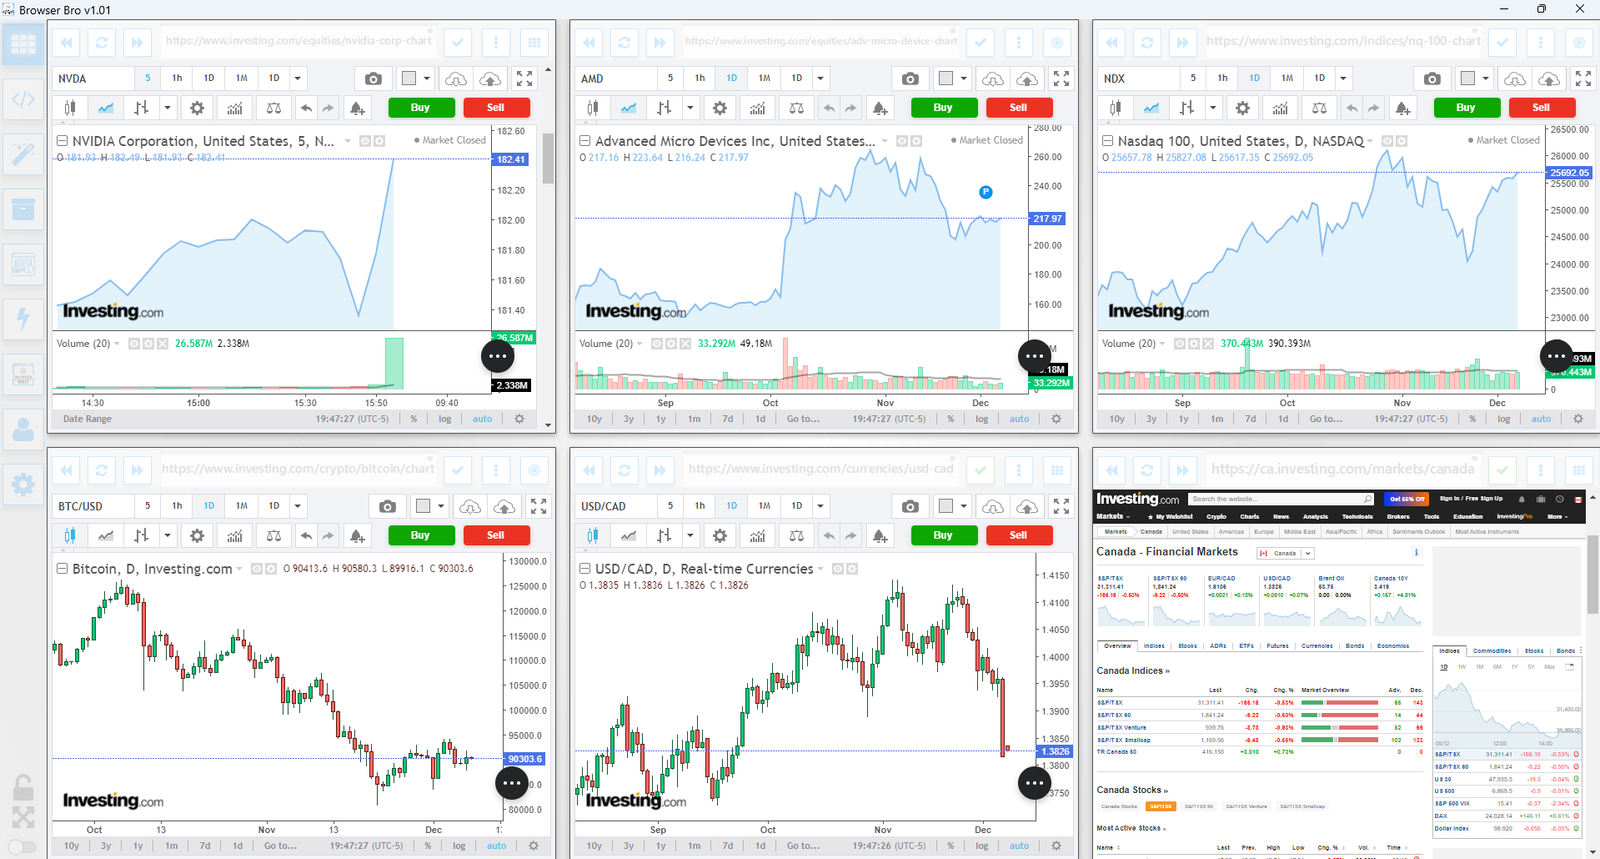
Next, in each browser, enter the address of each site you wish to go to and press enter.

Zoom and Scroll to the part of the page you want to see.
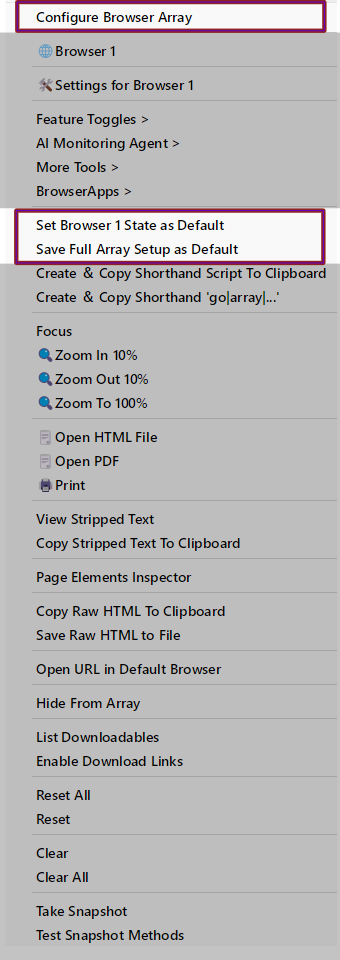
Ready to Save the state of your array?
Click the action menu and …
To set ALL Browsers at Once, choose “Save Full Array Setup As Default”
to save this particular browser then choose “Set Browser x State as Default”
You can also turn this setup into a shorthand script by selecting “Create & Copy Shorthand Script To Clipboard”
Method 2:
You can also turn this setup into a shorthand script by selecting “Create & Copy Shorthand Script To Clipboard” or by writing the script yourself. Generating the script includes scroll and zoom commands.
The first command “go|array|1×4” sets a 1 Row, 4 column grid. With the subsequent commands setting the site/page to load.
Its as easy as that.
Using this method lets you then save the script and switch to this setup with one click.
How to you build a custom Shorthand function?
The quickest way to script any webpage is to use an AI Chatbot and to supply it with a snippet of the webpage you wish to script.
- Go to the webpage you want to script
- open your browser’s inspector
- Find the component that encompasses the part you want to interact with
- Right-Click & Copy HTML Element
- Next paste this into your AI prompt where you ask:
“Write a self executing javascript function that helps me to test this form by filling it out with sample data and pressing Submit.”
- When your AI returns a snippet, copy it to your clipboard.
- We are almost done.
- Go to Browser Bro Scripting Page
- Selection JS Editor using the toggle

- Paste the javascript code into the editor
- Review and test to make sure it does what you want.
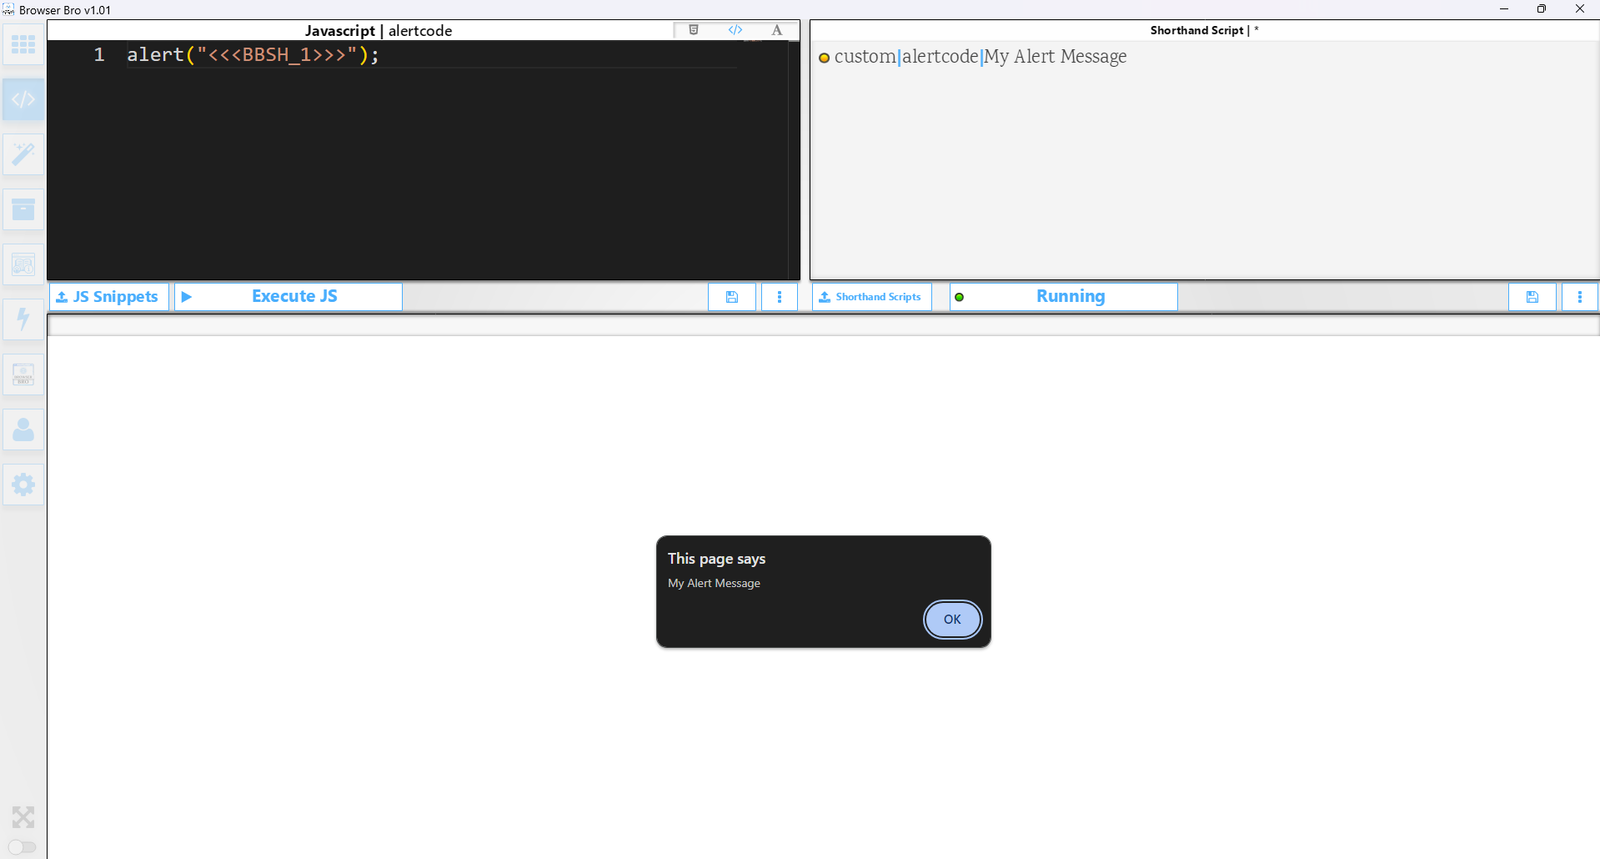
- Place your Browser Bro placeholder into the script. “<<<BBSH_1>>>”, “<<<BBSH_2>>>”,etc
- Press
 and save the snippet under the name you wish to use for the function. eg: test_form
 - Use the “custom| …” shorthand command to run your custom shorthand / javascript function.
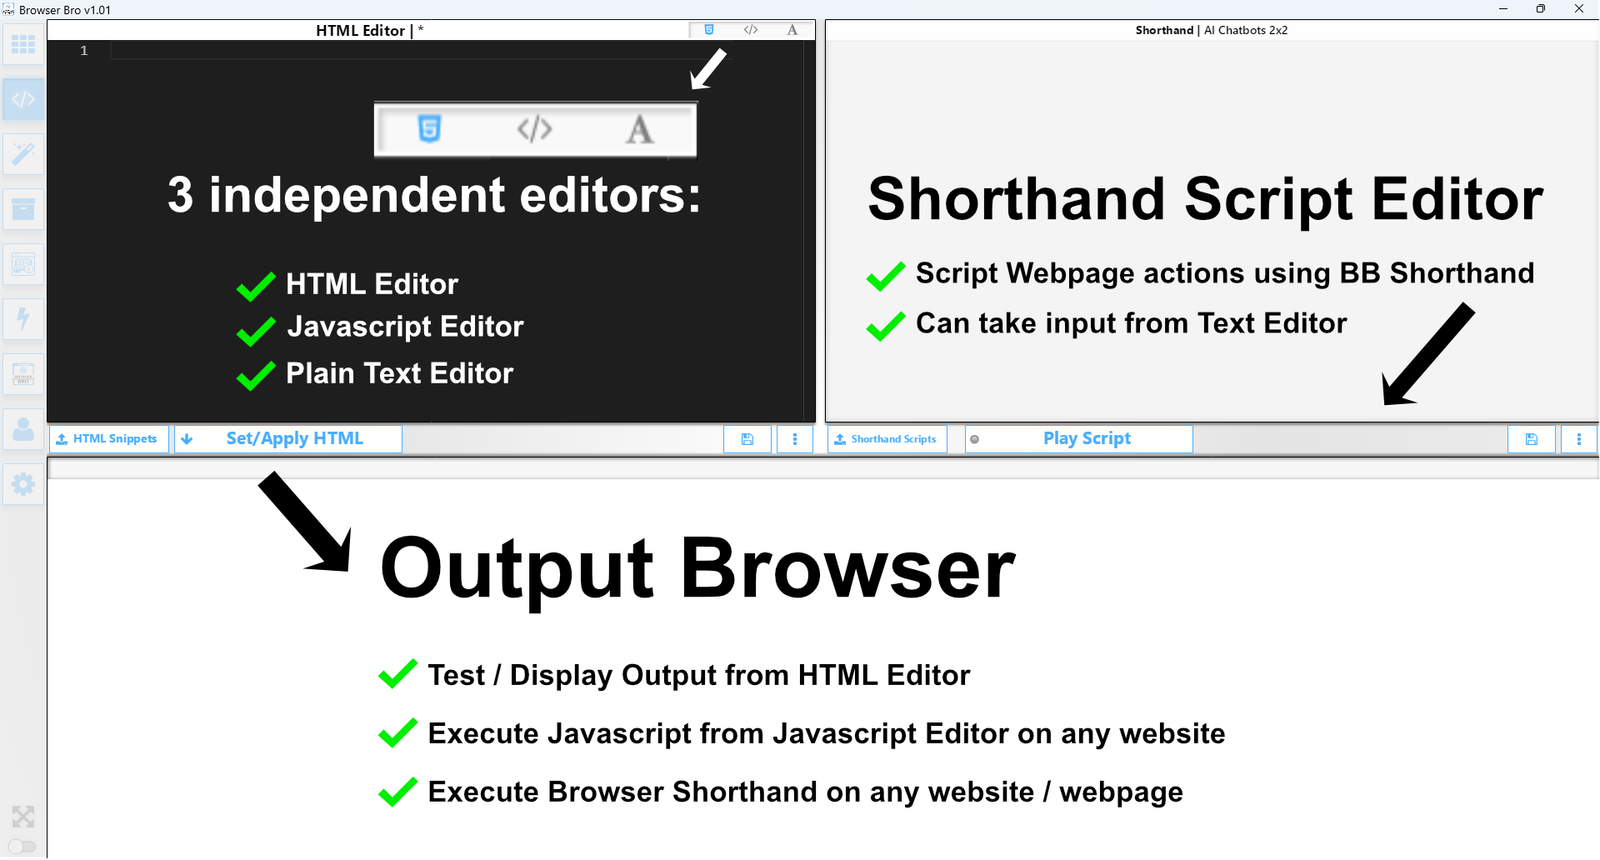
How to script a basic webpage interaction?
 To script interactions with a webpage using Shorthand Scripting is not difficult. Begin by opening the webpage you wish to script into the Output Browser of the Browser Bro Scripting Page. Just type the address in the field above the Output Browser and press enter.
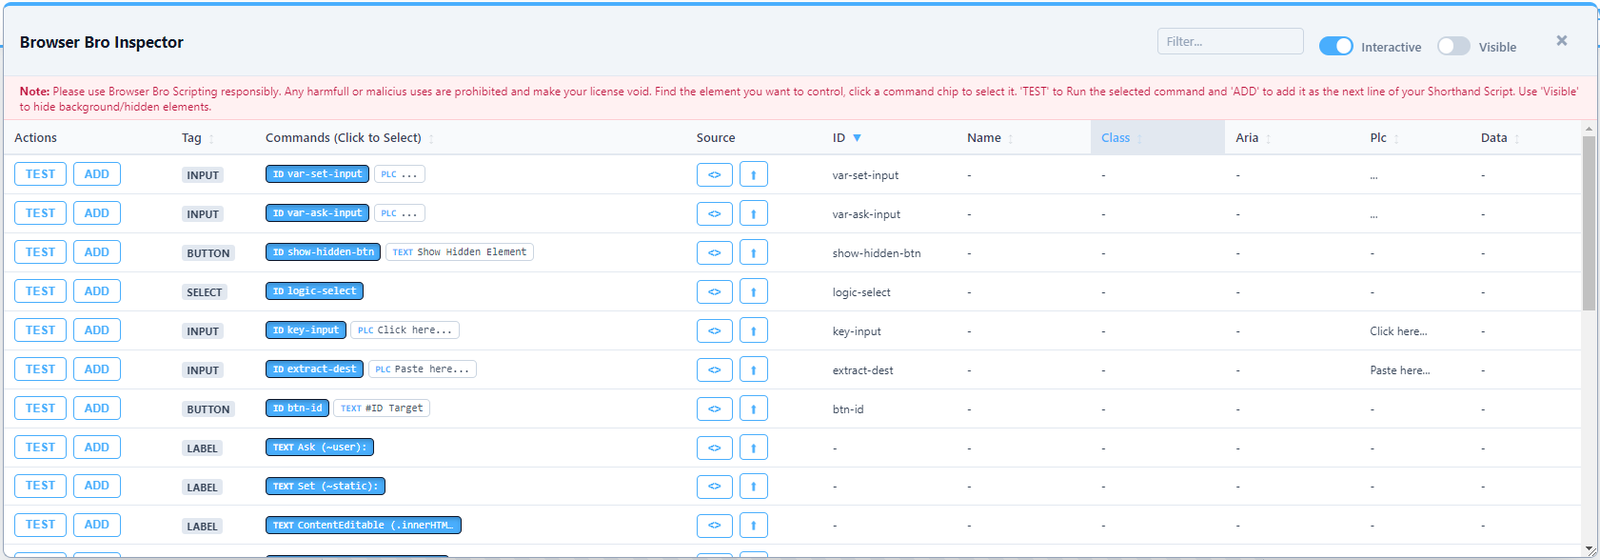
The most important thing to understand is that to effect anything on a webpage you need a way to reference it.
In Browser Bro’s Shorthand Language we can reference controls on a webpage using its HTML attributes.
The TYPE command, for example, supports referencing controls by ID, name, class, aria, XPath, CSS, Placeholder
The easiest is selecting the Right Actions Menu and selecting “Elements List” from the right most actions menu.
Using this tool you can see what controls can be referenced on the page, and you can test which reference method works best.
How to set up the AI Monitoring Agent
Setting up the monitoring agent is easy, and involves 2 steps:
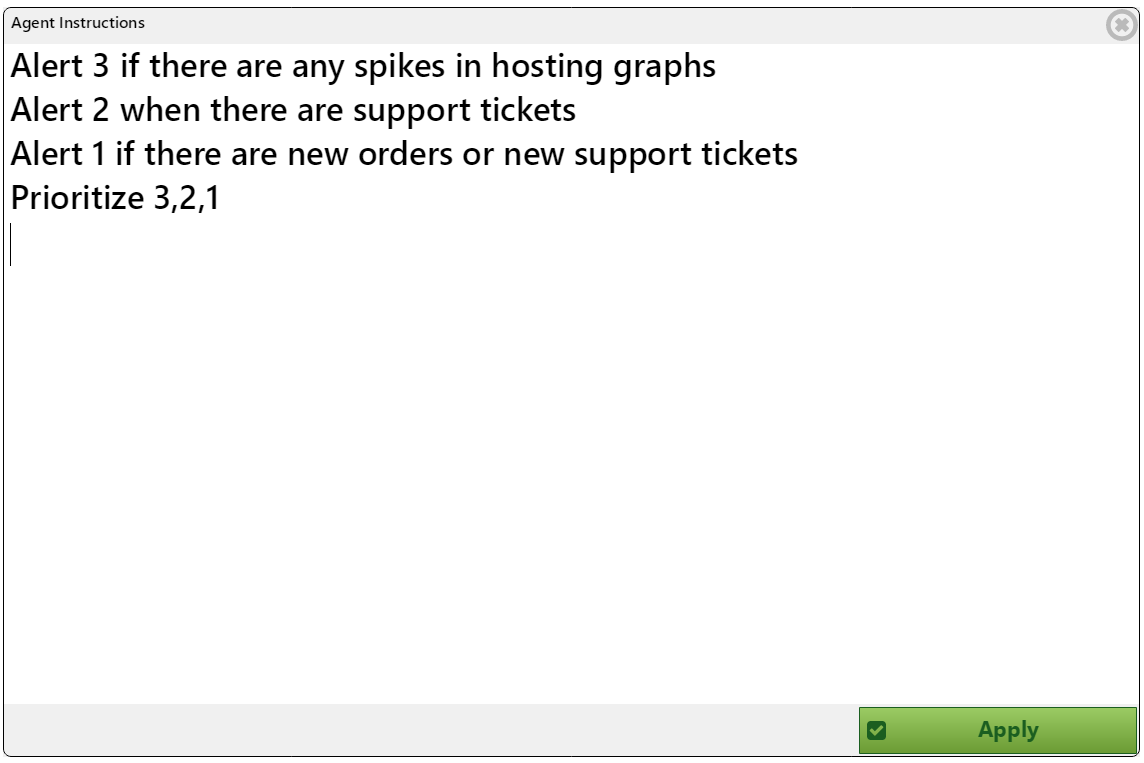 Writing instructions for your agent to follow. tell it when to when to use alert 1, 2, or 3, and whether to include an email notification. This is done in the “Monitoring Agent” Section of the Browser Bro Settings.
- Define what from each browser (from Browser Array) you wish to send to the Monitoring Agent.

How to Optimize Token Count ($Cost) for AI Monitoring Agent
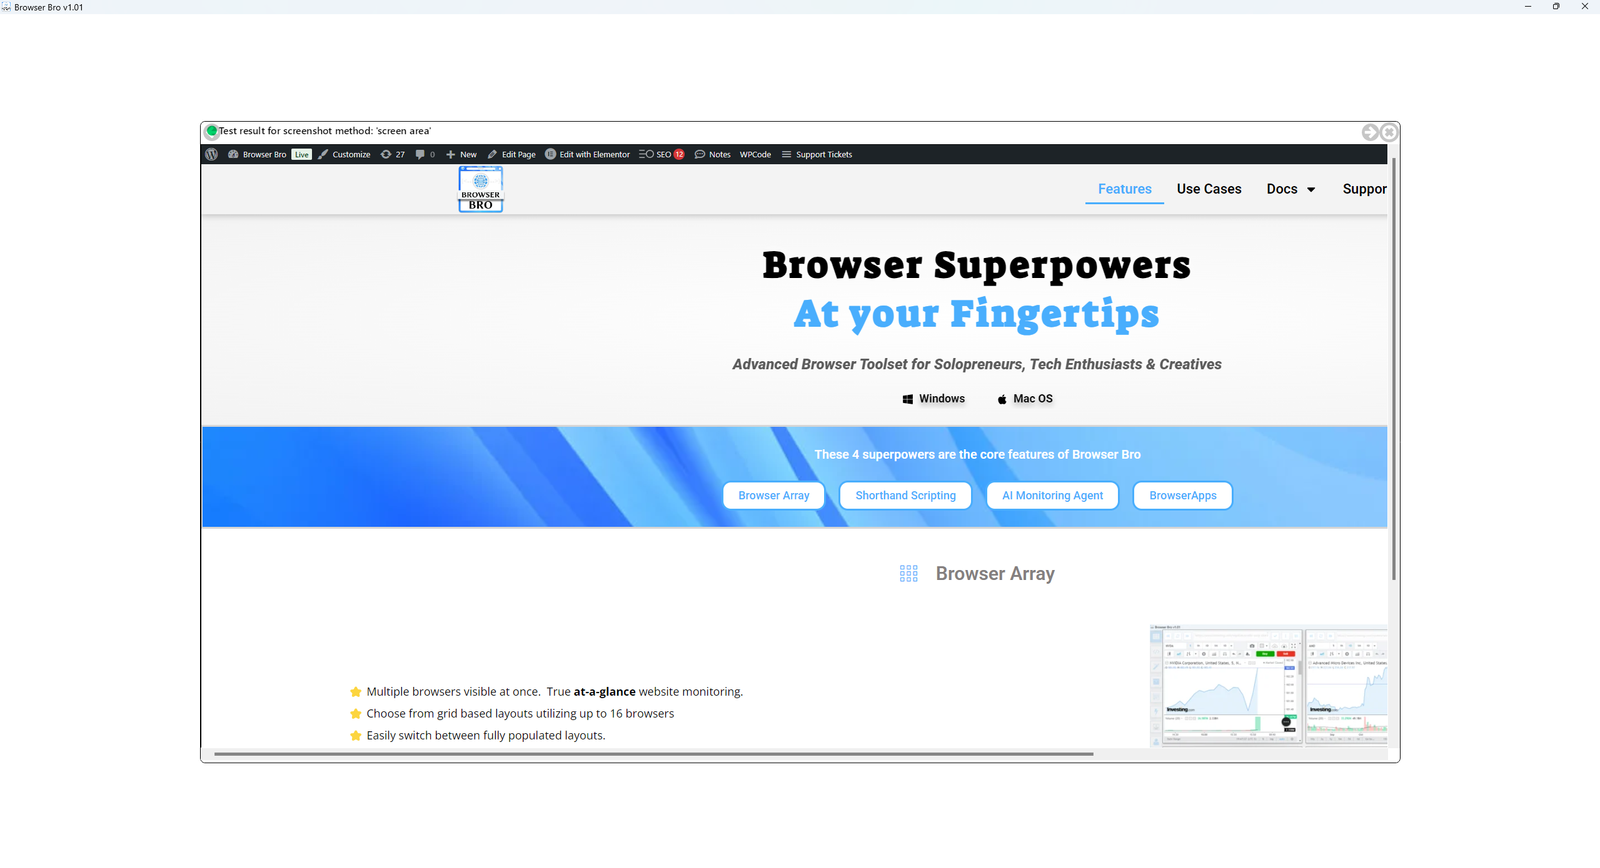
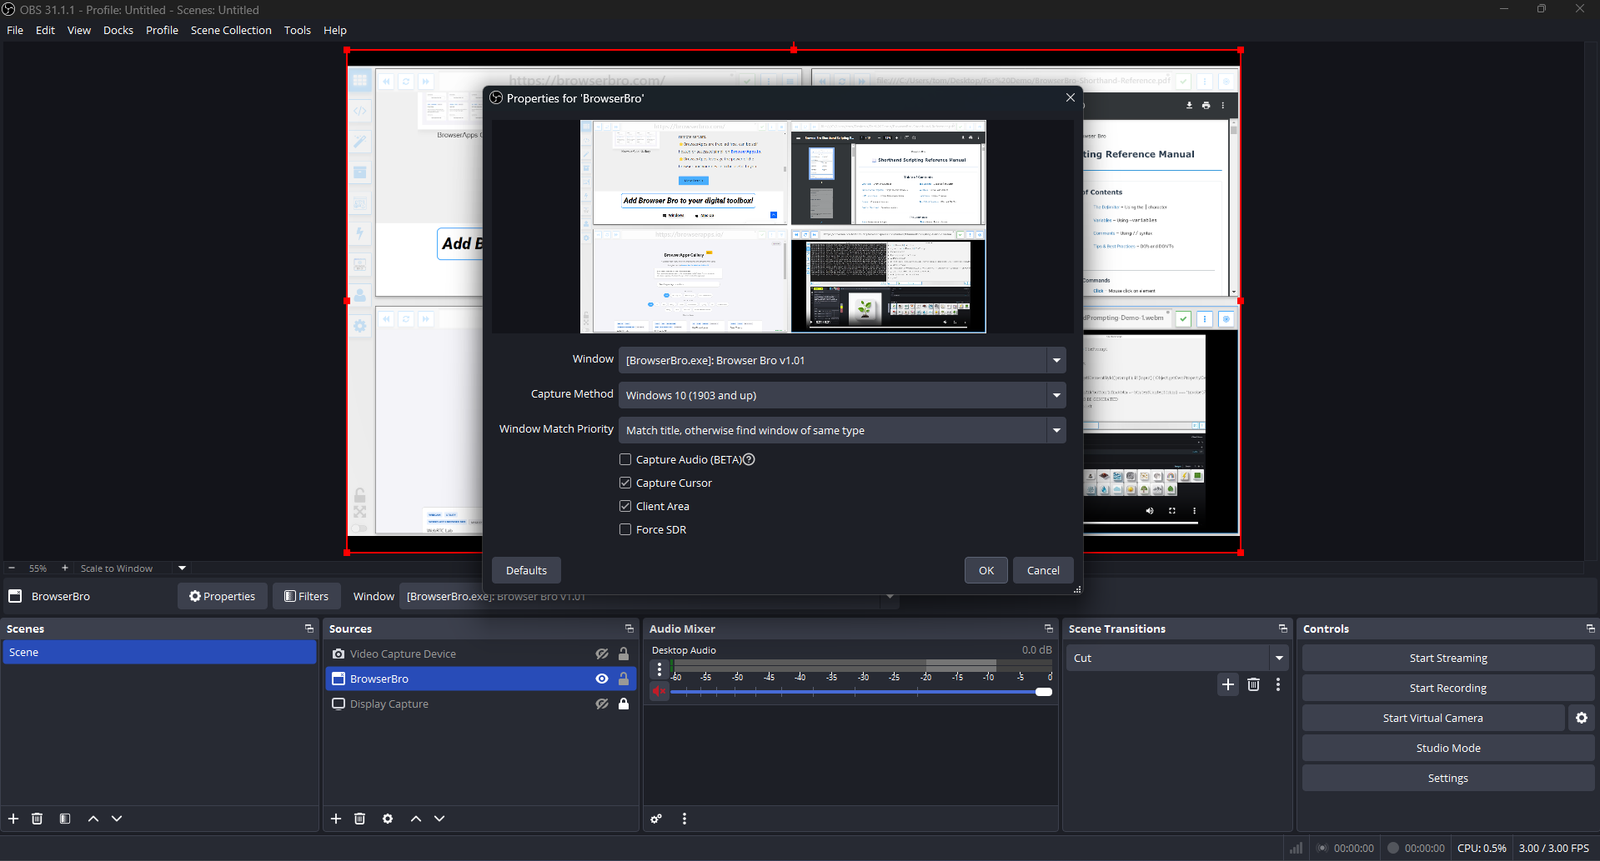
How to get the best webpage snapshots
The web is a very dynamic place and taking a snapshot of a webpage is more complex than one would think.
Browser Bro supports ALL the different ways in which a snapshot of a webpage can be taken. In most cases, one of them works * best *.
Finding this is easy:
- Click the Action menu of the browser you want to take a snapshot of
- Select “Test Snapshot Methods”
- Wait for tests to complete
- Using the arrows in the header, cycle through the various tests to see how each one looks .
- Click the X to close the test popup
- Select “Browser n Settings” from the browser’s “Action Menu”
- Set the “Custom Snapshot Method” Setting
